Archive for August, 2024
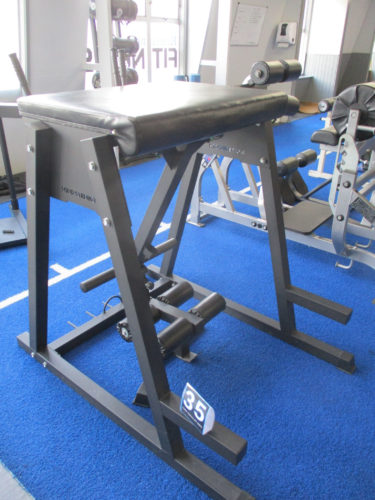
I train at 2 gyms – this one for posterior chain
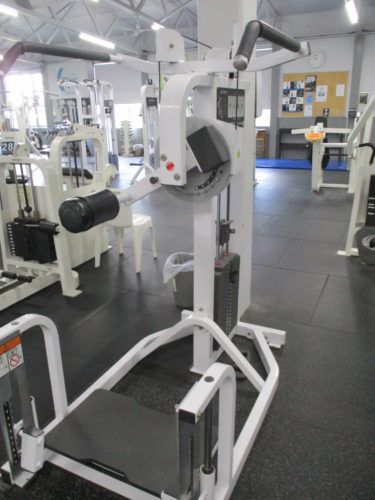
This is Kensington fitness in Whangarei, Northland, New Zealand.
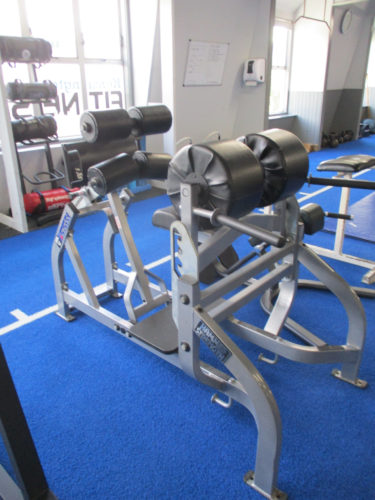
I train here once per week to get my posterior chain done. I love the reverse hyper and GH machines.

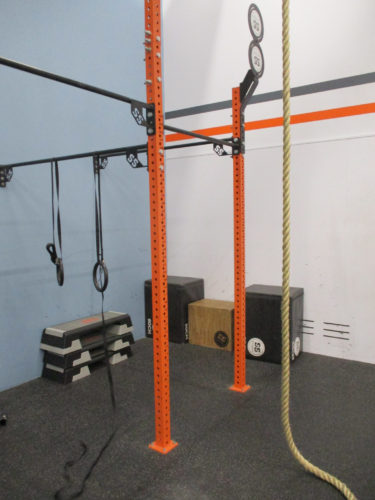
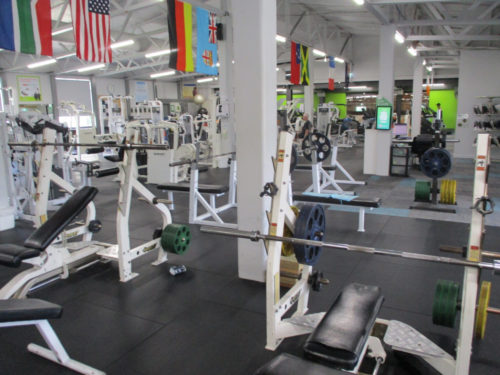
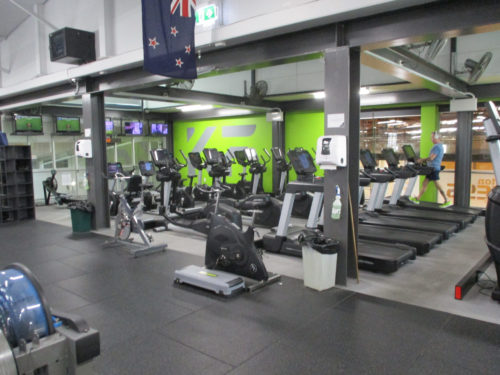
It actually has four gyms in one facility. As you can see on a Sunday it was nearly empty. I had a full crossfit floor to myself.
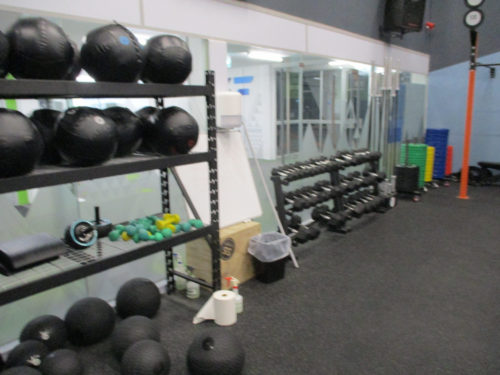
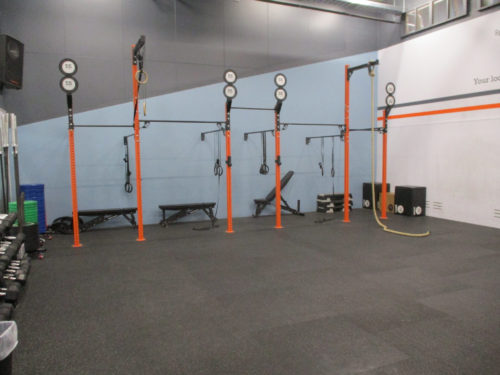
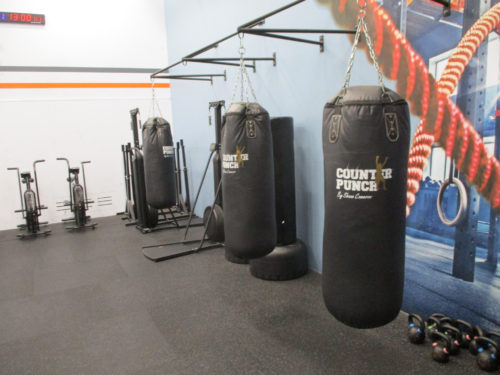
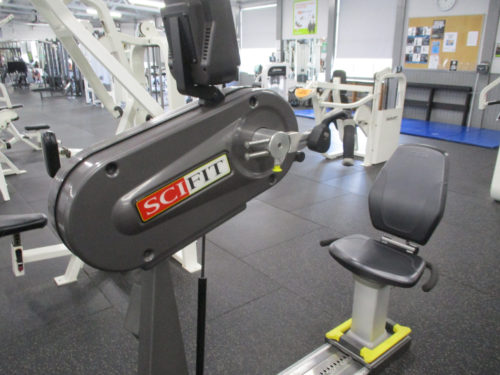
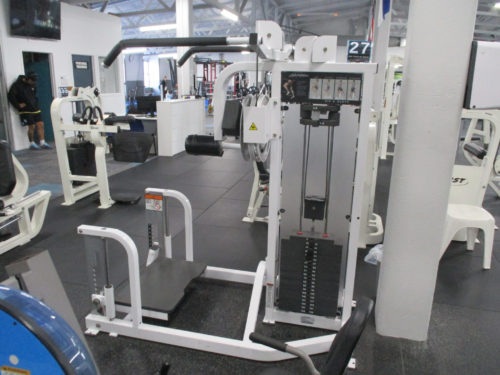
Here is some of the main gym floor


Why get good at bodyweight training before going hard with weights?
1. Establishing Fundamental Movement Patterns:
- Developing Proper Form: Bodyweight exercises like push-ups, squats, and planks teach you the fundamental movement patterns that are essential for safe and effective weightlifting. These exercises help you learn how to engage the right muscles, maintain a neutral spine, and move with proper alignment. Without mastering these basics, you are more likely to develop bad habits and improper form when lifting weights, increasing the risk of injury.
- Muscle Memory: Practicing bodyweight exercises helps build muscle memory for proper form, which carries over to weight training. For instance, learning to keep the back straight during bodyweight squats lays the groundwork for proper form when progressing to barbell squats.
2. Building Joint and Tendon Strength Safely:
- Conditioning Connective Tissue: Bodyweight exercises place less stress on the joints compared to heavy weights, making them ideal for gradually conditioning your tendons and ligaments. This gradual strengthening is crucial for preparing your body to handle the increased loads of weight training safely, reducing the risk of joint injuries.
- Injury Prevention: Starting with bodyweight training helps ensure that your joints and tendons are strong enough to support heavier weights. It’s a safer way to build up the joint stability and tendon strength needed to handle the stress of lifting weights without getting injured.
3. Enhancing Core Stability and Overall Balance:
- Core Engagement: Bodyweight exercises inherently engage the core, which is essential for stability. A strong core supports the spine and helps maintain proper posture, crucial for performing weightlifting exercises safely. If you jump straight into weight training without a solid core foundation, you risk improper form, which can lead to back injuries and other issues.
- Balance and Coordination: Unilateral bodyweight exercises (e.g., single-leg squats, one-arm push-ups) enhance balance and coordination by forcing each side of the body to stabilize independently. This builds a balanced foundation that helps prevent the development of muscular imbalances, which can compromise lifting technique and increase injury risk.
4. Developing Functional Strength:
- Translatable Strength: Bodyweight exercises develop functional strength that mimics real-world movements. This means you are not just getting stronger, but you are also becoming more capable in everyday activities and athletic movements. This functional strength serves as a foundation for the more specific, targeted strength developed through weight training.
- Natural Progression: Bodyweight training allows for natural progression in strength and complexity. You can start with easier variations and gradually move to more challenging ones (e.g., progressing from knee push-ups to standard push-ups, then to one-arm push-ups). This controlled progression reduces the risk of overloading your muscles too quickly, which can happen if you start with weights that are too heavy.
5. Improving Flexibility and Range of Motion:
- Mobility: Bodyweight exercises require and promote a full range of motion. This improves flexibility, which is crucial for performing weightlifting exercises correctly. Poor flexibility can lead to compromised form, such as partial squats or limited shoulder mobility, which reduces the effectiveness of exercises and increases injury risk.
- Foundation for Advanced Movements: Having a good range of motion prepares your muscles and joints for advanced weightlifting techniques that require more flexibility, such as deep squats or overhead lifts. Without this foundation, you may struggle with proper form when lifting heavier weights.
6. Developing Proprioception and Mind-Muscle Connection:
- Body Awareness: Bodyweight training enhances proprioception, or the body’s awareness of its position in space. This is crucial for maintaining proper form under the stress of weight training. Knowing how your body moves and feels during bodyweight exercises helps you better understand how to position your body correctly when lifting weights.
- Mind-Muscle Connection: Learning to focus on specific muscle engagement during bodyweight exercises helps develop the mind-muscle connection. This connection is vital for targeted muscle development in weight training, ensuring that the intended muscles are doing the work, which maximizes strength gains and muscle growth.
Conclusion:
By getting good at bodyweight training first, you create a solid foundation of movement quality, joint integrity, balance, core strength, and flexibility. This foundation not only minimizes the risk of injury when you begin weight training but also maximizes the effectiveness of your weight training efforts. Skipping this step can lead to improper form, muscle imbalances, joint issues, and slower strength gains, ultimately making your fitness journey less efficient and more prone to setbacks. Establishing this foundation is a smart, strategic approach to building long-term strength and fitness.
Structured Push-Up Program for Bench Press Strength
Editors note: Remember Press ups will ultimately build your endurance and conditioning along with hypertrophy. Those things can support maximum strength training but are not quite the same thing. However read the addendum at the end 
Training Frequency:
- Weekly Routine: Perform this program 3-4 times per week. Each session will include variations of push-ups, dips, pull-ups, and occlusion training. Rest at least one day between sessions to allow for recovery.
Phase 1: Base Building (4-6 Weeks)
Objective: Build foundational strength, endurance, and stability while beginning occlusion training.
- Standard Push-Ups: 3-4 sets of 15-20 reps. Focus on form, engaging the chest, triceps, and shoulders. Rest 60-90 seconds between sets.
- Incline Push-Ups: 3 sets of 15-20 reps. Use a bench or step to place hands higher than feet. Rest 60 seconds between sets.
- Ring Push-Ups: 3 sets of 8-12 reps. Introduce ring push-ups to engage stabilizers. Rest 90 seconds between sets.
- Dips: 3 sets of 8-10 reps. Use parallel bars or rings. Focus on controlled movement to protect shoulders. Rest 90 seconds between sets.
- Pull-Ups: 3 sets of 6-8 reps. Perform overhand grip pull-ups, focusing on full range of motion. Rest 90 seconds between sets.
- Occlusion Training: Apply occlusion straps during the last 1-2 sets of each exercise (push-ups, dips, pull-ups). Use light to moderate pressure. Perform 12-15 reps per set when using occlusion.
Phase 2: Progressive Overload (6-8 Weeks)
Objective: Introduce added resistance to increase strength and muscle mass.
- Weighted Push-Ups: 3-4 sets of 8-12 reps. Use a weight vest or backpack. Increase weight as you progress. Rest 90-120 seconds between sets.
- Decline Push-Ups: 3 sets of 10-12 reps. Elevate feet on a bench to shift focus to the upper chest. Rest 90 seconds between sets.
- Resistance Band Push-Ups: 3 sets of 10-15 reps. Use a resistance band around your back. Rest 90 seconds between sets.
- Ring Dips: 3 sets of 8-10 reps. Adding rings adds instability, challenging stabilizers. Use a weight belt if bodyweight becomes too easy. Rest 90-120 seconds between sets.
- Pull-Ups: 3 sets of 8-10 reps. Use different grips (overhand, underhand, neutral) for variety. Consider adding weight once bodyweight is manageable. Rest 90 seconds between sets.
- Occlusion Training: Continue using occlusion straps for the last 1-2 sets of each exercise. Adjust pressure for comfort and safety, focusing on the increased pump and muscle fatigue. Perform 10-12 reps per occlusion set.
Phase 3: Plyometric and Power Development (4-6 Weeks)
Objective: Develop explosive power and enhance fast-twitch muscle fiber activation.
- Plyometric Push-Ups: 2-3 sets of 5-8 reps. Push explosively off the ground, maximizing airtime. Rest 90-120 seconds between sets.
- Clap Push-Ups: 2-3 sets of 5-8 reps. Add a clap mid-air to ensure maximum explosiveness. Rest 90-120 seconds between sets.
- Speed Push-Ups: 3-4 sets of as many reps as possible in 10-15 seconds. Focus on speed and explosiveness. Rest 90 seconds between sets.
- Ring Muscle-Ups (Optional, Advanced): 2-3 sets of 3-5 reps. Combines pulling and pushing movements for a full upper body challenge. Rest 120 seconds between sets.
- Dips: 3 sets of 6-8 reps. Continue with standard or weighted dips. Rest 90-120 seconds between sets.
- Pull-Ups: 3 sets of 6-8 reps. Include explosive pull-ups or weighted variations. Rest 90 seconds between sets.
- Occlusion Training: Use occlusion straps during speed push-ups, dips, and pull-ups for the last 1-2 sets. Perform 8-10 reps per occlusion set, ensuring proper safety and monitoring.
Phase 4: Occlusion Training and Strength Integration (4-6 Weeks)
Objective: Maximize hypertrophy, transition gains into bench press strength, and continue occlusion training.
- BFR Push-Ups (Rings or Standard): 3-4 sets of 10-12 reps. Apply occlusion straps to enhance muscle activation and metabolic stress. Rest 90 seconds between sets.
- BFR Dips and Pull-Ups: 3 sets of 8-10 reps. Continue using occlusion straps to increase muscle activation. Rest 90-120 seconds between sets.
- Weighted Push-Ups or Decline Push-Ups: 3 sets of 8-12 reps, using heavier weights than earlier phases. Rest 90 seconds between sets.
- Bench Press Integration: 3-4 sets of 5-8 reps, starting with manageable weight and progressing. Focus on re-acclimating to the bench press movement. Rest 120 seconds between sets.
- Ring Muscle-Ups (Optional): 2-3 sets of 3-5 reps, focusing on strength and coordination. Rest 120 seconds between sets.
Measuring Progress and Adjustments
- Regular Testing: Test your bench press max every 4-6 weeks to track progress. Use these benchmarks to adjust intensity and volume.
- Flexibility and Mobility: Include dynamic warm-ups before training and static stretching post-workout. Focus on the shoulders, chest, and thoracic spine.
- Nutrition and Recovery: Prioritize a diet rich in protein for muscle repair and growth. Consider using creatine and other performance-enhancing supplements. Aim for 7-9 hours of sleep each night and stay hydrated.
Realistic Expectations
This program should help increase your bench press strength by up to 100 pounds by focusing on muscle memory, hypertrophy, power development, and stability. The timeline for achieving these gains could range from 6 months to a year, depending on your response to training and recovery.
Conclusion
This integrated program combines push-ups, ring training, dips, pull-ups, and occlusion to create a comprehensive strength and hypertrophy regimen. It’s designed to leverage your background as a former advanced lifter, utilizing progressive overload, instability, and occlusion training to maximize strength gains. By maintaining consistency and allowing for adequate recovery, this program will help you rebuild and exceed your previous bench press capabilities.
Addendum: Strength Correlation Between Push-Ups and Bench Press
Push-ups and bench press share a strong correlation, as both exercises engage the chest, triceps, and shoulders. Standard push-ups lift about 64% of body weight, while high-velocity push-ups with elevated legs can lift 70-75%. When performing one-arm push-ups, the effective load increases significantly, often lifting 75-80% or more of body weight with one arm.
This demonstrates elite strength levels, comparable to a 100kg athlete lifting approximately 160 kg (352 lbs) in a bench press, highlighting the effectiveness of advanced push-up variations for building upper body strength.
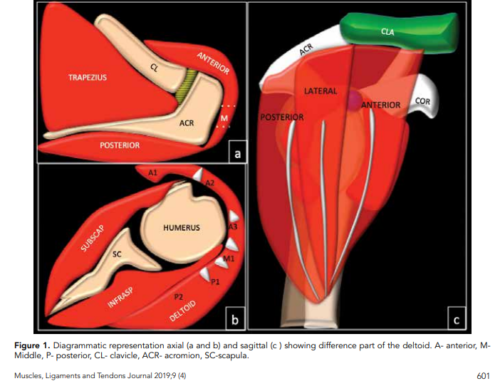
Understanding Deltoid Muscle Anatomy: Avoiding Common Misconceptions
The deltoid muscle, comprising the anterior, lateral, and posterior heads, is one of the most crucial muscles for achieving a well-rounded and balanced shoulder appearance. However, there’s a common misconception that needs to be clarified: when you view the shoulder from the side, much of the visible muscle mass is mistakenly attributed solely to the lateral (side) deltoid head. In reality, a significant portion of that mass includes contributions from the anterior and posterior deltoid heads.
Section 1: Anatomy of the Deltoid Muscle
The deltoid muscle is a triangular-shaped muscle that covers the shoulder joint, allowing for a wide range of movements. It is divided into three heads:
- Anterior (Front) Deltoid: This head originates from the clavicle and is primarily responsible for shoulder flexion, internal rotation, and horizontal adduction. It is heavily involved in pressing movements, such as the bench press and overhead press.
- Lateral (Side) Deltoid: The lateral deltoid originates from the acromion and is the main muscle responsible for shoulder abduction, which is the movement of lifting the arm away from the body. It’s typically targeted with exercises like lateral raises.
- Posterior (Rear) Deltoid: This head originates from the spine of the scapula and is responsible for shoulder extension, external rotation, and horizontal abduction. Exercises like reverse flyes and face pulls target the posterior deltoid.
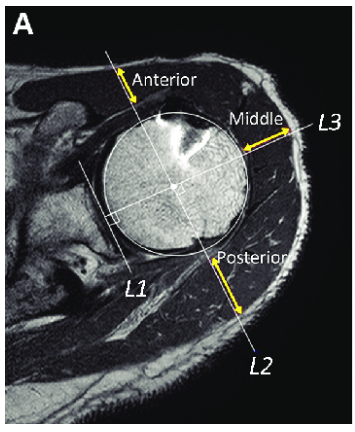
Section 2: The Side View Misconception
When viewed from the side, the shoulder’s rounded appearance is not due to the lateral deltoid alone. In fact, a substantial portion of what you see is the anterior and posterior deltoid heads wrapping around the shoulder joint. This anatomical overlap means that people often overestimate the mass of the lateral deltoid when, in reality, much of the visible muscle mass from this angle belongs to the front and rear deltoids.
This misconception can lead to an unbalanced training approach, where individuals may overemphasize lateral raises in an attempt to increase shoulder width, while neglecting other critical exercises that target the anterior and posterior deltoid heads.
Section 3: Exercises to Maximize Deltoid Growth
To achieve well-developed, balanced shoulders, it’s essential to target all three heads of the deltoid muscle with a comprehensive training approach. Here’s how to do it:
- Anterior Deltoid:
- Overhead Press: A compound exercise that targets the anterior deltoid along with the triceps and upper chest. Using a barbell or dumbbells, perform this exercise with controlled motion to maximize anterior deltoid activation.
- Front Raises: Use dumbbells or a barbell to lift the weight straight in front of you, focusing on the contraction of the anterior deltoid.
- Lateral Deltoid:
- Lateral Raises: This exercise isolates the lateral deltoid, helping to create shoulder width. To ensure maximum activation, avoid swinging the weights and keep the movement slow and controlled.
- Upright Rows: This movement targets the lateral deltoids and trapezius muscles. Use a wider grip to focus more on the lateral deltoid.
- Posterior Deltoid:
- Reverse Flyes: This exercise is crucial for developing the posterior deltoid. It can be performed with dumbbells, cables, or a machine.
- Face Pulls: Use a rope attachment on a cable machine to perform face pulls. This exercise not only targets the posterior deltoid but also improves shoulder stability and posture.
Section 4: Putting It All Together
To maximize deltoid growth while taking into account the relative size of each head, it’s essential to structure your workout with the correct volume distribution:
- Posterior Deltoid (Rear Deltoid):
- Exercise Volume: Because the posterior deltoid comprises about half of the total deltoid mass, it should receive approximately 50% of your deltoid training volume.
- Recommended Exercises:
- Reverse Flyes: 5 sets of 12-15 reps. This isolates the posterior deltoid and helps build rear shoulder mass.
- Face Pulls: 5 sets of 12-15 reps. This exercise not only targets the posterior deltoid but also improves shoulder stability and posture.
- Bent-Over Rows (with a focus on rear delts): 4 sets of 10-12 reps. Ensure that you keep your elbows high to target the posterior deltoid effectively.
- Anterior Deltoid (Front Deltoid):
- Exercise Volume: Given that the anterior deltoid is larger than the lateral deltoid, it should receive more attention, though less than the posterior deltoid.
- Recommended Exercises:
- Overhead Press: 4 sets of 8-10 reps. This compound movement is essential for developing the anterior deltoid, along with the triceps and upper chest.
- Front Raises: 4 sets of 10-12 reps. This exercise isolates the anterior deltoid, helping to build the front of the shoulder.
- Arnold Press: 3 sets of 8-10 reps. This variation of the overhead press gives extra attention to the anterior deltoid.
- Lateral Deltoid (Side Deltoid):
- Exercise Volume: As the smallest of the three heads, the lateral deltoid requires less volume but still plays a crucial role in shoulder width and aesthetics.
- Recommended Exercises:
- Lateral Raises: 4 sets of 12-15 reps. This exercise isolates the lateral deltoid and helps create shoulder width. Focus on controlled movement to maximize muscle engagement.
- Upright Rows: 3 sets of 10-12 reps. With a wider grip, this exercise targets the lateral deltoid effectively while also engaging the traps.
Balanced Deltoid Workout Example
- Reverse Flyes: 5 sets of 12-15 reps
- Face Pulls: 5 sets of 12-15 reps
- Overhead Press: 4 sets of 8-10 reps
- Front Raises: 4 sets of 10-12 reps
- Lateral Raises: 4 sets of 12-15 reps
- Arnold Press: 3 sets of 8-10 reps
- Upright Rows: 3 sets of 10-12 reps
This structure ensures that the posterior deltoid receives the most attention, followed by the anterior deltoid, with the lateral deltoid also being effectively trained to ensure well-rounded shoulder development. Adjusting volume based on the relative mass of each deltoid head will help prevent imbalances and contribute to a more aesthetically pleasing and functionally strong shoulder.
Conclusion
Understanding the anatomy of the deltoid muscle and recognizing the common misconception about the side deltoid’s mass is crucial for developing balanced shoulders. By targeting all three deltoid heads with a well-rounded training program, you can achieve the full, rounded shoulder appearance that is often desired. Avoid overemphasizing one head at the expense of others, and ensure that your training program allows for equal development across the entire deltoid muscle.
Balanced shoulder development not only improves aesthetics but also contributes to shoulder health and overall upper body strength. Remember, the deltoids are a complex muscle group, and effective training requires a comprehensive approach.